> For the complete documentation index, see [llms.txt](https://guide.cryosparc.com/llms.txt). Markdown versions of documentation pages are available by appending `.md` to page URLs; this page is available as [Markdown](https://guide.cryosparc.com/processing-data/automated-workflows/practical-tips-using-workflows-to-process-your-own-data.md).
# Practical tips: using Workflows to process your own data
## Uploading volumes and masks for use in Workflows
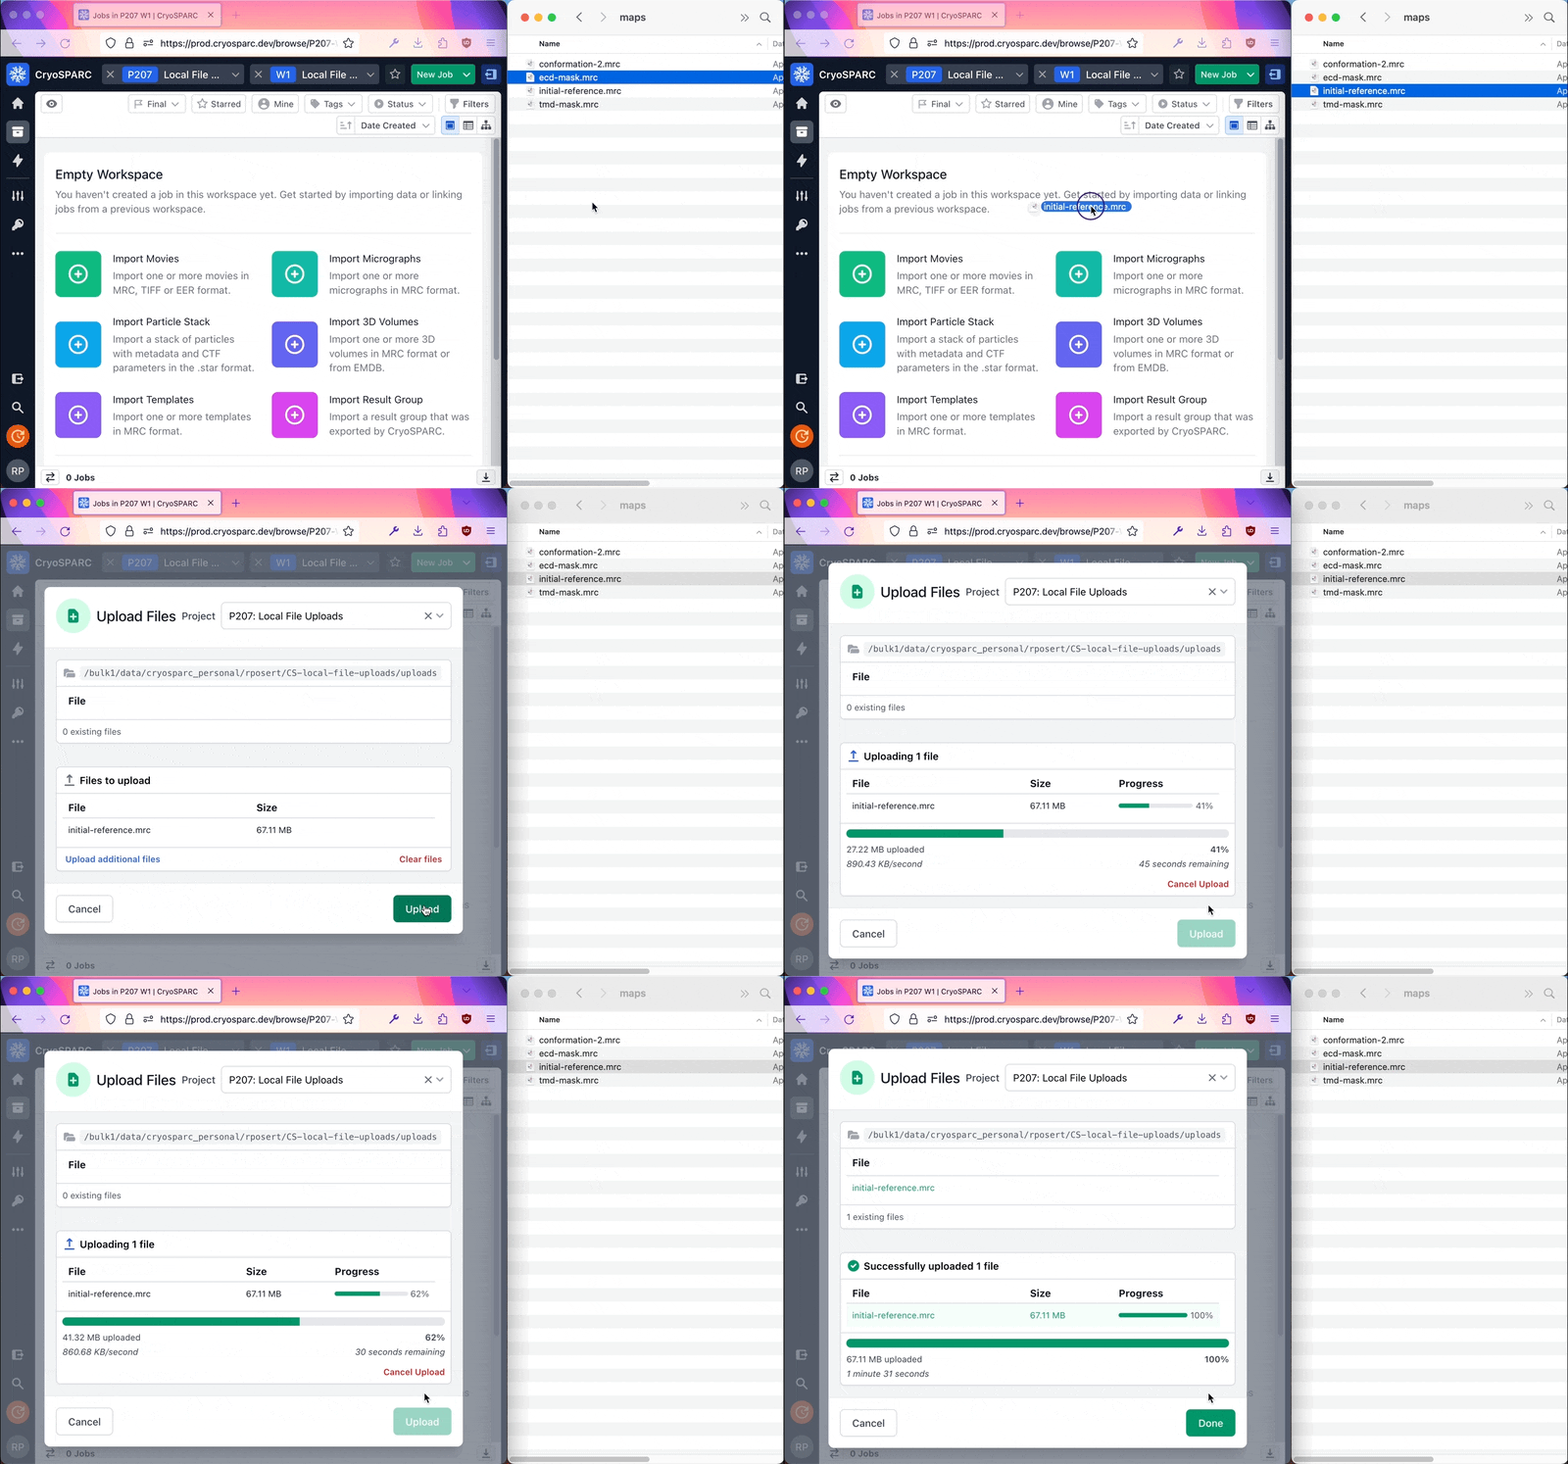
All volumes and masks need to be within your filesystem including reference volumes, junk volumes, and masks, but they do not necessarily need to be located within the project where you intend to launch the automation workflow. The easiest way to upload files from your local filesystem to your compute infrastructure for use within CryoSPARC is to drag the file (or multiple files) to any CryoSPARC browser window:
* Files uploaded to CryoSPARC through the browser are added to a directory named `uploads` in the selected CryoSPARC project directory. The upload dialog lists all files already in the uploads directory in the first panel.
* Once the uploads have completed, the Upload Files dialog can be closed (by clicking the green Done button) or more files can be uploaded by dragging and dropping into the dialog.
* The [Upload Local Files](https://guide.cryosparc.com/application-guide-v4.0+/upload-local-files) guide page has more tips and guidance on the CryoSPARC browser upload system.
If these volumes will be used across multiple CryoSPARC projects, you can make a directory within your compute filesystem where these volumes can be uploaded. Use `scp` from the command line or an SFTP software to upload them to the appropriate directory.
## Importing the Workflow JSON file
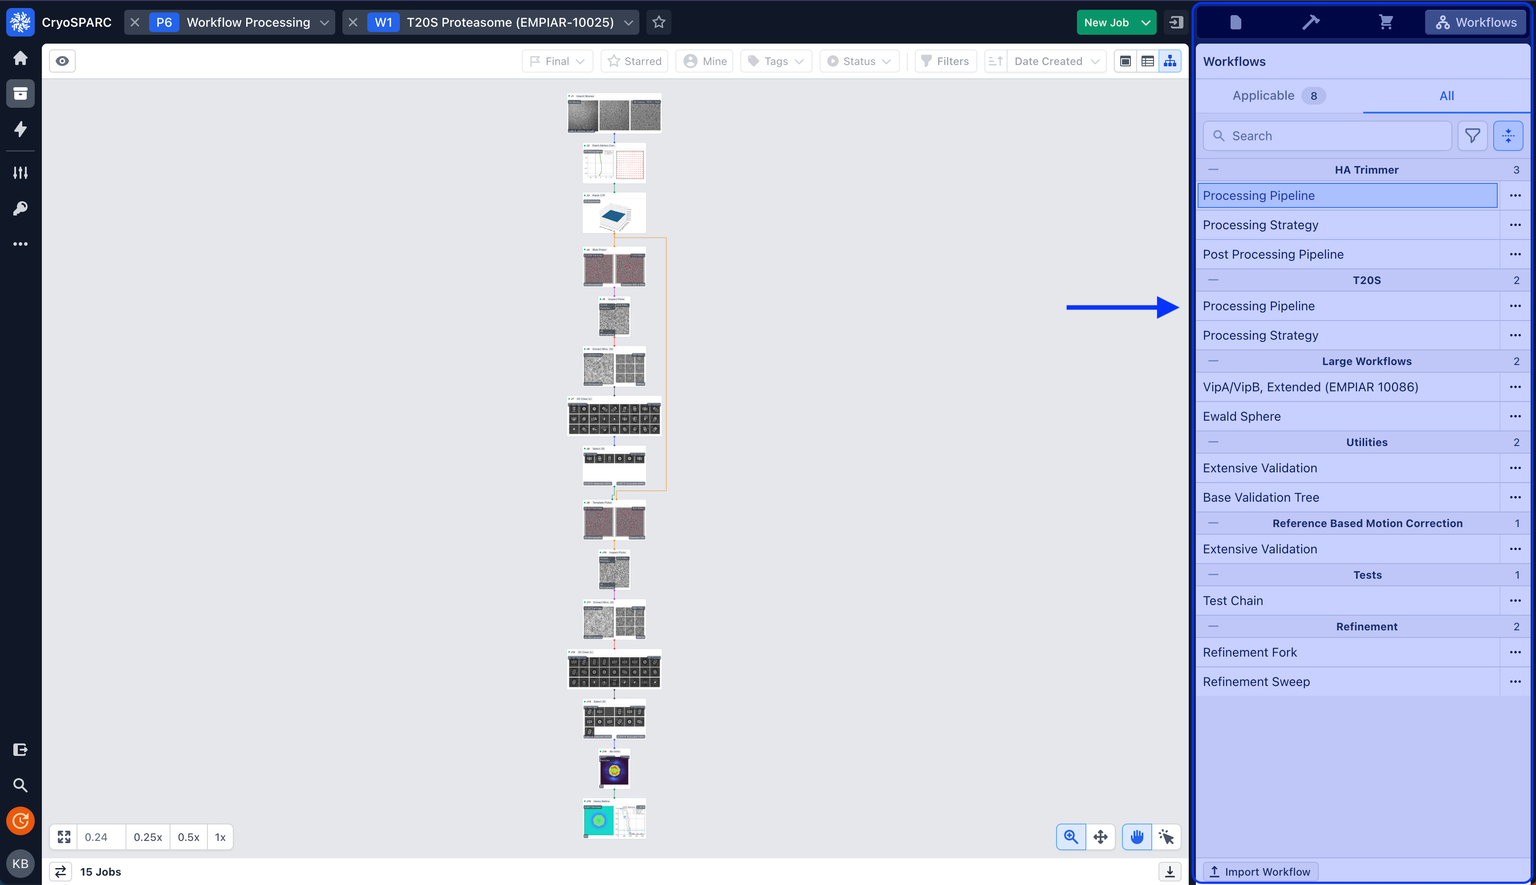
A workflow can be imported by clicking the “Import Workflow” button (red arrow) on the footer of the Workflows sidebar. This will open a file browser where you can find and upload a workflow `.json` file from your local filesystem.
Once selected the file will be imported into your instance and will appear in the Workflows sidebar like any other workflow. The imported template has no special properties outside of a `imported` attribute to demarcate it as created outside of the instance. The imported workflow can be used, modified, and exported like any other.
The automated processing workflows for GPCRs will be placed into a group titled `Automated Workflows`.
## Applying the Workflow
Navigate to the “Workflows” sidebar panel:
From here, click on the appropriate workflow to open the Workflow Apply Dialog:
* The settings section contains a `Queue on Apply` option. This allows you to set all jobs to queue as soon as the template is applied. The `Queue to Lane` option allows you to choose the lane the jobs will queue onto during application if you toggled the `Queue on Apply` option.
* The proceeding job panels include all of the parameters that were exposed during the workflow’s creation.
* Jobs that had no parameters set to a custom value or made visible during creation will not be shown, and will be coloured grey in the tree view.
* Locked parameters are read-only in this view, and are denoted with a lock icon.
* Resetting a parameter in this view will set it back to the custom value defined during creation.
* Parameters that are flagged for adjustment prior to running are highlighted in orange and can easily be navigated to using the ‘Flagged’ parameters menu.
{% hint style="warning" %}
Before applying the `agpcr_workflow_live_exposures.json` workflow, ensure that the parent job (Live Exposure Export) is selected before opening the workflow from the Workflows panel.
{% endhint %}
## Adjusting parameters in a Workflow
The Workflows functionality allows for parameters to be flagged as a pseudo-requirement to running the workflow of which there are multiple flagged parameters in the provided workflows.
On the dialog footer you will see a “Flagged Parameters” tracker that shows the total number of flagged parameters and number of updated flagged parameters. Clicking this button will reveal a menu checklist of flagged parameters, organized by job, with a check mark-circle indicating whether it has been updated or not. Clicking a parameter in the menu will navigate to it.
Changing the value of a flagged parameter will update its colour to green and mark it with a green check mark.
In these workflows the parameters that will need to be updated include:
1. Import movies
1. Movies data path
2. Gain reference path
3. Raw pixel size (Å)
4. Accelerating voltage (kV)
5. Spherical aberration (mm)
6. Total exposure dose (e/Å^2)
7. Flip gain ref and defect file in Y
2. Import 3D Volumes
1. Path to volumes/masks for GPRC reference, junk volumes, and the receptor mask
3. Patch Motion Correction
1. Output F-crop factor
4. Exposure Group Utilities
1. Regular expression string
5. Extract from micrographs (x2)
1. Extraction box size
It is important to note that flagged parameters are not hard requirements. A workflow can be deployed without its flagged parameters having been updated. This is to maintain flexibility and not lock a user into updating a parameter they do not wish to.
## Executing the Workflow
The footer includes an “Apply” button to deploy the workflow into the current workspace, and a “Repeat” Button, which allows you to deploy the workflow and then open an identically configured Apply Dialog for quickly repeating the pipeline.
For this example, we will maintain our default parameter values, select the “Queue on Apply” option, and apply the workflow in the tree view by clicking the “Apply” button. All of the jobs included in the workflow will now be automatically created, connected together, and queued onto the selected lane.
{% hint style="info" %}
More details about all things workflow related can be found on the [Workflows](https://guide.cryosparc.com/application-guide-v4.0+/workflows) guide page, including how to modify or rebuild a workflow for further customization.
{% endhint %}